What if you wanted to use WooCommerce, GeoIP and Multisite to display a store notice based on a visitor’s IP address, but no plugin exists for it?
That’s the situation I found myself in recently.
One option is to develop a plugin for it, like I do all the time for such cases.
But, I found an easier way. All it takes is the GeoIP Detection plugin and some CSS. That’s it.
Here’s how I hacked the WooCommerce store notice so it displays based on a visitor’s IP address.
WooCommerce GeoIP and Store Notification Solution
The use case where I used this hack happens to be for a WordPress Multisite setup, where the sites are identical. However, they serve different geographies due to having physical inventory for each region they are serving.
The “.com” website serves the US customers, where as the “.com/au” serves Australia (AU) and the rest of the world sales.
Below are the steps to implement WooCommerce GeoIP store notices for two different scenarios.
You can skip to the solution that works best for you:
- Scenario One – Inform user outside of US to use the international site
- Scenario Two – Tell the US user to use the American version of the site
If you need a different solution, feel free to reach out to my team and me.
Scenario One
In this scenario, a visitor outside of the US who has a non-US IP address lands on the US site.
So, you want to inform them that there’s an international site where they can order from instead of the US site they are currently on.
Step #1: Enable the WooCommerce Store Notice
Start by enabling the WooCommerce Store Notification on the US site.
This can be done in the WooCommerce > Settings > General tab.
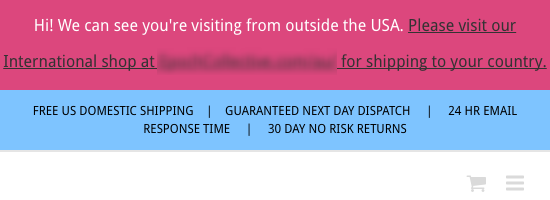
As previously mentioned and this notice you want to create, you will inform non-US visitors that there is an international store (AU site) where they can order products and link them to the site such as in the example below.

As it is now, the store notice will display for everyone visiting the US site. What we want to do is hide it for visitors with US IP address since they are already on the US site.
Step #2: Plugin Setup
Now let’s setup the GeoIP Detection plugin so that we can detect which country visitors are coming from based on their IP address.
After installing and activating the plugin, we will need to download the Maxmind database to our server under Tools > GeoIP Lookup.
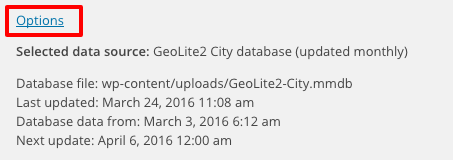
Then, click the Options link to setup the GeoIP database.

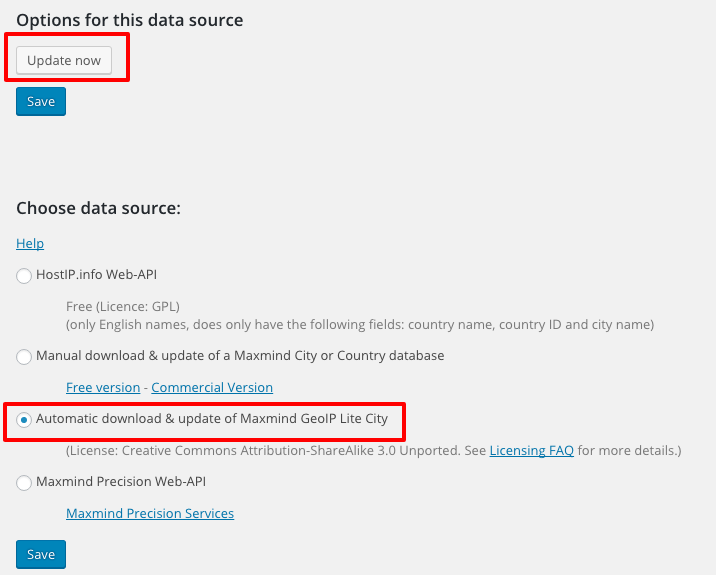
Select the data source as Automatic download & update of Maxmind GeoIP Lite City.
Next, click the Update button.

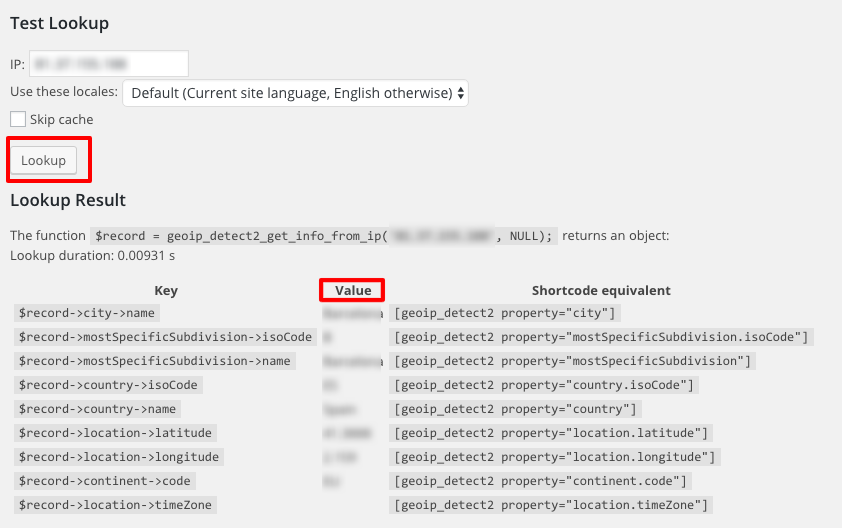
This should download the GeoIP database. You can verify this by going back to the original screen and clicking the Lookup button.

The results will yield a table. Ensure the Values column is correct for your IP.
Step #3: Enable CSS in the Options
This is the interesting bit which saves time and effort.
In the Options of the GeoIP Detection plugin, select to add a CSS class to the body of each page which indicates the country each visitor is from.
For example, “geoip-country-US” or “geoip-country-AU” and similar options.

Now, you can use CSS to hide the notification for US IP addresses since they are already on the US site.
Step #4: Add the CSS
Next, you need to add CSS specific to the US site. This means it should be saved in the theme options (i.e. site specific database) as opposed to the style.css file which is shared for all sites in the Multisite network.
Here is the CSS code we need to add to style and hide the store notice:
p.demo_store {background-color: #dc477d;}
.geoip-country-US p.demo_store {display: none;}
.geoip-country-US #wrapper[style] { margin-top: 0px !important; }
The first line of CSS simply styles the background of the store notification to whatever color that best matches your theme and stands out to get the visitor’s attention.
The second line of CSS hides the store notice for users within the US, with the help of the geoIP class “geoip-country-US” discussed in step three.
The third line of CSS is an interesting hack needed to override an inline CSS style. It seems that there’s a “wrapper” DIV that defines the top margin for the store notification in an inline style.
If we hide the store notification alone, it will still push down the whole site due to this top margin.
To remove this margin, we need to override it using this CSS. The “[style]” of the div is modified and “!important” is added to override it.
Test this for yourself by removing this line. Then, place it back to visually see what this CSS does in this case.
With those three lines, you have created a store notification bar that informs all non-US visitors that there is an international store where they can order from instead of the US store they are on.
Now onto scenario two, where we will set up the store notification for the International store.
Scenario Two
In this case, a visitor from the US who has a US IP address lands on the AU site.
So, you want to inform them that there’s a US-dedicated site where they can order from instead of the AU site they are currently on.
It may be important to note that many of the steps will be similar to scenario one, but with slight modifications.
Step #1: Enable Store Notices
Similar to scenario one, enable the WooCommerce store notification on the AU site, in the WooCommerce > Settings > General tab.
In this notice you’re creating, you will inform US visitors that there is a US site where they can order products and link them to the site such as in the image below.

As it is now, the store notice will display for everyone visiting the AU site. What we want to do is hide it for all visitors other than those with a US IP address since there is a US dedicated site.
Step #2 and #3: Plugin Setup and Enabling CSS
In this case, these steps are exactly the same for the AU site as in scenario one so review those above before continuing.
Step #4: Adding the CSS
Again, here’s the interesting part of this solution: we need to remember to place the CSS in the theme options as opposed to the style.css file so it’s only added to the AU site.
The CSS in this case is somewhat different as we are hiding the store notice for every IP other than US IPs:
p.demo_store {background-color: #dc477d;}
p.demo_store {display: none;}
#wrapper[style] { margin-top: 0px !important; }
.geoip-country-US p.demo_store {display:block;}
.geoip-country-US #wrapper[style] { margin-top: 56px !important; }
@media screen and (max-width: 865px) { .geoip-country-US #wrapper[style] { margin-top: 92px !important; } }
@media screen and (max-width: 444px) { .geoip-country-US #wrapper[style] { margin-top: 128px !important; } }
@media screen and (max-width: 339px) { .geoip-country-US #wrapper[style] { margin-top: 164px !important; } }
Let’s skip the first line and talk about the second and third lines. The CSS is pretty much the same as with scenario one, except that we’re hiding the store notice for all visitors.
In the next five CSS lines, you’re showing the store notice to US visitors because you want to redirect them to the US site.
To do this, you must display the store notice with line 3 and restore the top margin as well in line 4. Line 5, 6 and 7 is added because on smaller devices, the text wraps into more than one line. Therefore, the top margin needs to be larger for each new line.
Please note: The “max-width” value will be specific to the text length placed in the store notice so you may have to play around with that number to get it just right.
Conclusion
While creating a plugin be ideal, this is a quick solution that should do the trick to create a WooCommerce GeoIP store notice for Multisite installs.
At Progressus, we’re verified WooCommerce experts so we can create the best possible solution for your specific needs. For example, we can create an elegant plugin that completes all the tasks above on the server-side and has administrator options to control to whom and when store notices are displayed. Let us know what you need and we can help.
What kind of WooCommerce GeoIP Multisite store notice solutions do you need? Were you successful with the steps above or did you run into issues where we can assist you? Let us know in the comments below.


Great tutorial.
Is there a plugin to show notice by Geo Ip on Woocommerce product page?
Hey Alex,
We did write about showing notices with a customised Geo IP plugin here: How to Create a WooCommerce GeoIP Multisite Store Notice.
If you check it out and you still have questions, feel free to comment and ask away. We’ll see what we can do to help.
Best,
Jenni