Skip to content
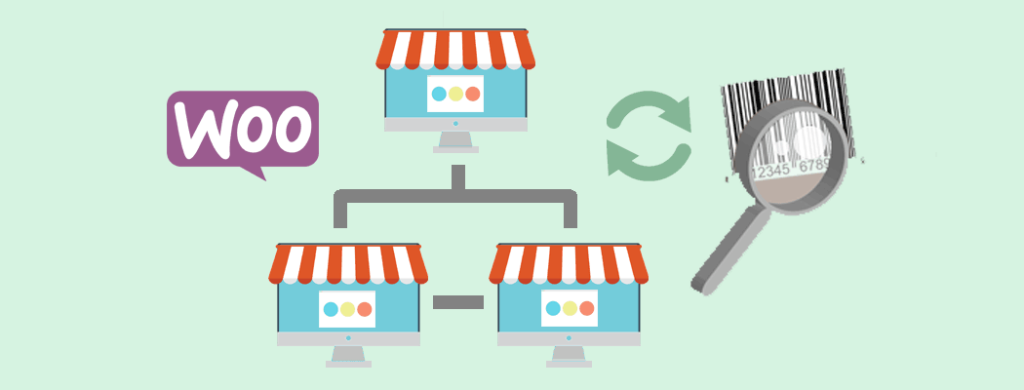
Adding a WooCommerce Multisite stock sync feature means a single inventory can be tracked and accessed across multiple or all online stores within a WordPress network.
Enabling Multisite on WordPress lets you create multiple sites under the umbrella of one main site. When you add WooCommerce into the mix, the network of sites becomes one of online stores.
With the help of the Central Stock for WooCommerce extension, you can sync your inventory across your network quickly. You won’t have to worry about touching any code.
Here’s more detail on WooCommerce Multisite, how to set up inventory syncing with this plugin as well as alternative options.
Quick Reminder: What is WooCommerce Multisite?
Wondering, “How do I combine two WooCommerce stores?”
The answer is WooCommerce Multisite. As previously touched upon, Multisite is a program that comes built-in with the WordPress software. When you enable it, you transform your one website into a main site with a network. You can create as many other sites as you want and that your hosting can handle.
Installing the free WooCommerce plugin means any of the sites within your WordPress Multisite network can be turned into online stores.
You can manage all sites (or stores) within your network using one admin dashboard that can connect you to all the other sites. You can also choose to manage sites individually. This means you can have an administrator of just one site within the network whilst you manage it all.
For more details, check out our other articles: WordPress Multisite and WooCommerce Multisite: An Overview, and How to Set Up and Update a WooCommerce Multisite Network.
How Does WooCommerce Sync Inventory?
On its own, WooCommerce Multisite doesn’t sync your inventory for you. You either need to install a plugin such as Central Stock for WooCommerce or you can use an alternative.
Other WooCommerce Multisite Stock Sync Options
To see other options, check out 4+ Top WooCommerce Multisite Inventory Sync WordPress Plugins.
Beyond that, you could also create your own solution with custom code. If you’re not into DIY or you would rather have verified WooCommerce experts like us take care of it for you, feel free to reach out.
How Do You Sync Products in WooCommerce?
Here’s how to create your own WooCommerce Multisite stock sync feature with the Central Stock for WooCommerce plugin.
When you have two or more stores in your network with the same Stock Keeping Unit (SKU) identification code, your inventory is synced after a quick configuration.
After that, each instance of that product is automatically updated once:
- A customer purchases that item from one of the online stores in the network or
- You manually update the amount of stock you have for that item.
Before you get right to it, be sure to do some basic housekeeping.
Essential Prep Before Getting Started
If you haven’t already done so, go ahead and create a WooCommerce Multisite network.
Already have one set up? Be sure to back up your entire network. That way, if something goes amiss, you can restore your network and try again. Also be sure to test your backup before continuing to ensure it works and that there weren’t any issues during the compiling or compressing process.
It’s also recommended you use a staging or local development environment to keep your live site error-free for your visitors and customers.
It’s also important to note that the following requirements need to be met:
- WordPress Multisite 4.8+
- PHP 7.0.x or greater
1. Installing the Central Stock for WooCommerce Plugin
Once that’s out of the way, start by downloading a copy of the Central Stock for WooCommerce plugin. Then, install it network-wide.
You can install the plugin as you typically would on the main site in the network.
You can check out these pages in the WordPress Handbook for details on how to do this: Multisite Network Administration and Upload via WordPress Admin.
2. Creating Sites and Products in Your Network
When your network is set up, be sure to create at least one other online store in your network. For details, check out How to Set Up and Update a WooCommerce WordPress Multisite Network.
If you haven’t created a product in your network to sync yet, do that now. Then, be sure to create the same one in at least one other store in your network.
To create a product, go to the admin dashboard of the store in your network where you want to set up the synced item.
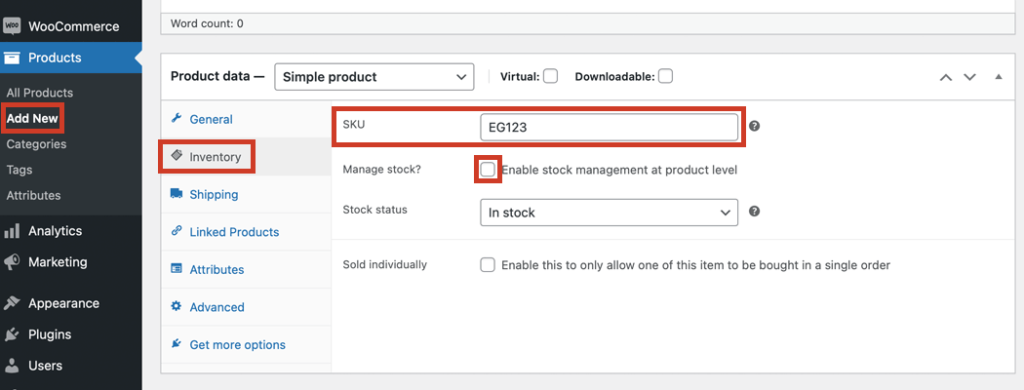
Then in the menu on the left, go to Products > Add New. Add the product details that you need.
Under the description text area and in the Product data screen element, click on Inventory in the menu towards the left. Add a SKU, then check the Manage stock box.
Additional options will appear dynamically. You’ll be able to add the quantity of stock, whether you allow backorders and the threshold for low stock.
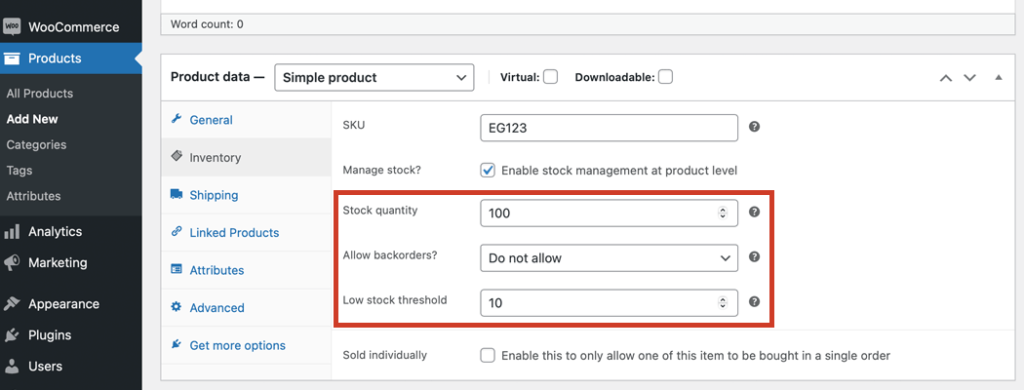
You can choose not to allow backordering or you can choose to let customers be notified when the product is in stock and on the way.
The Low stock threshold is the quantity of stock that’s left when you want to be notified about it. That way, you have a chance to restock before your current inventory reaches zero.
Once that’s all done, you can finish configuring the product. Then, click Publish towards the right to save your changes and add the product to your store.
3. Creating a WooCommerce Multisite Stock Sync Feature
To sync your inventory across multiple stores in your network, add the same product to another store with the step directly above. Make sure you use the same SKU as the original product you just created.
4. Testing Your New WooCommerce Multisite Stock Sync Feature
Now, it’s time to do some testing to make sure everything works. Either manually enter a new stock quantity or make a test purchase on the synced product.
As previously mentioned, when you do either, the other product copies will be automatically updated.
Once you’re happy with everything, create another full-network backup that includes the changes from your test site. Then, push your changes to your live site.
Other Similar Features You Can Add and Sync
There are also other features you can create and sync in your network. Here are other resources you can check out for details:
- WooCommerce Multisite Order Sync: How to Add This and More to WordPress
- Adding a WordPress Multisite User Sync Feature (with WooCommerce)
- 3+ Best WooCommerce Multisite Global Cart Options for WordPress
If You’re Not Keen to Go DIY
If you don’t want to add a WooCommerce Multisite stock sync feature on your own, you can hire a developer or agency.
When you start your search, consider your options carefully. Smaller and cheaper firms should be backed with a solid history of reviews or case studies before you give them your consideration.
Compare sites and profiles of developers. Most will offer a free consultation. Being armed with as much information as possible about what you want makes the process of getting a quote short and sweet.
Progressus.io is an agency that’s also officially vetted by WooCommerce so you can be sure you’re in the capable hands of experts. With years of experience designing customized WooCommerce websites and networks for a variety of unique clients, including the company behind WordPress.com, Automattic.
It doesn’t hurt to book a free consultation to discuss the costs and process of building your project. That way you’re informed and know your options.
Wrapping Up
If you have a WooCommerce Multisite network or you want to create multiple online stores that have their inventories synced, you can. You can custom code a plugin or you can use one of the WooCommerce Multisite stock sync plugins we’ve mentioned before.
The Central Stock for WooCommerce extension is one of the best options for being able to sync your inventory in a few clicks. With the steps above, you can make it happen.
Do you have any questions about this plugin or how to set up and configure it? Do you have any WooCommerce Multisite questions? Feel free to share them in the comments below.